A cob oven is a delightful and very useful addition to a smallholding. Debbie Kingsley, who runs courses on making them, shows you how
There were a few ‘must-haves’ (a workshop, good sized kitchen and 20 acres of land) when we were looking to upsize 10 years ago, but there was one little but significant desirable: a bread oven. I remember so well my first view of the farm with eyes closed to the ‘Dangerous, Do Not Enter’ signs, heart open to the beauty of the place itself. And there, in the kitchen, was a small black cast iron door, a traditional Devon clome oven. Then we realised that, although the oven was, theoretically, in perfect working order with a neat brick lined interior, the great big range that does all our cooking is positioned so that the bread oven door opens a few measly inches. You might be able to slide in a slim baguette at a pinch, but you could never build a fire inside it to cook anything.
Not to be defeated, my husband Andrew who has a bit of a passion for baking and makes all our bread, took control. One hot August four years ago, he told me he was having a week’s holiday to build a cob oven. The week of creation made for something of a party atmosphere; a holiday on a smallholding is a rare thing and the result would be something to celebrate and to use for future celebrations.
There’s a real synergy with nature with a cob oven; the main building materials come from the earth and it’s fired using waste timber from hedges or coppicing. It’s an incredibly easy thing to build, and protected from the elements a cob oven can last a lifetime. It works on the basis of stored heat, and takes a long time to get up to temperature so, to make best use of it, you really want to cook a succession of dishes.
What can you use it for?
A cob oven is particularly fabulous for baking and roasting things that have a good fat content, so crispy pizza and succulent roasts of lamb and duck are perfect as are mounds of roast vegetables generously sprinkled with flavoured oils and herbs. Because it’s so superheated it cooks food incredibly quickly – less than five minutes for a huge pizza or 45 minutes to roast a large duck.
It will bake bread, giving the crust a lovely nutty flavor from the wood smoke, and flatbreads work brilliantly too. There’s nothing to stop you putting in cast iron pots to cook stews, and when the heat is finally reduced at the end of the day, there are always meringues.
So what is a cob oven and what is cob?
A cob oven is made out of a dome of cob with walls about 10 inches (25cm) thick built on a firebrick base, and has no chimney – the smoke comes out of the single doorway, as do the embers and the food. Cob is a mix of sand or aggregate and clay with a small proportion of fibre (straw, rush or heather) to improve strength and reduce cracking. Its greatest enemy is wet and, even when rendered, it cannot tolerate prolonged soaking from above or below; the saying goes ‘cob needs a good hat and a stout pair of boots’.
How to make cob
Making cob is as much fun as making sausages. It’s permission to make mud pies in adult sized quantities. Mixing enough cob for an oven (you’ll need at least six barrow loads) is best done with shovels and multiple feet. Mix the aggregate and clay roughly with a shovel, then get your wellies on and start trampling until the mix becomes sticky, being careful not to get it too wet or it ‘splooges’ (bulges to you and me). Invite friends to help with the cob trampling and open the cider.
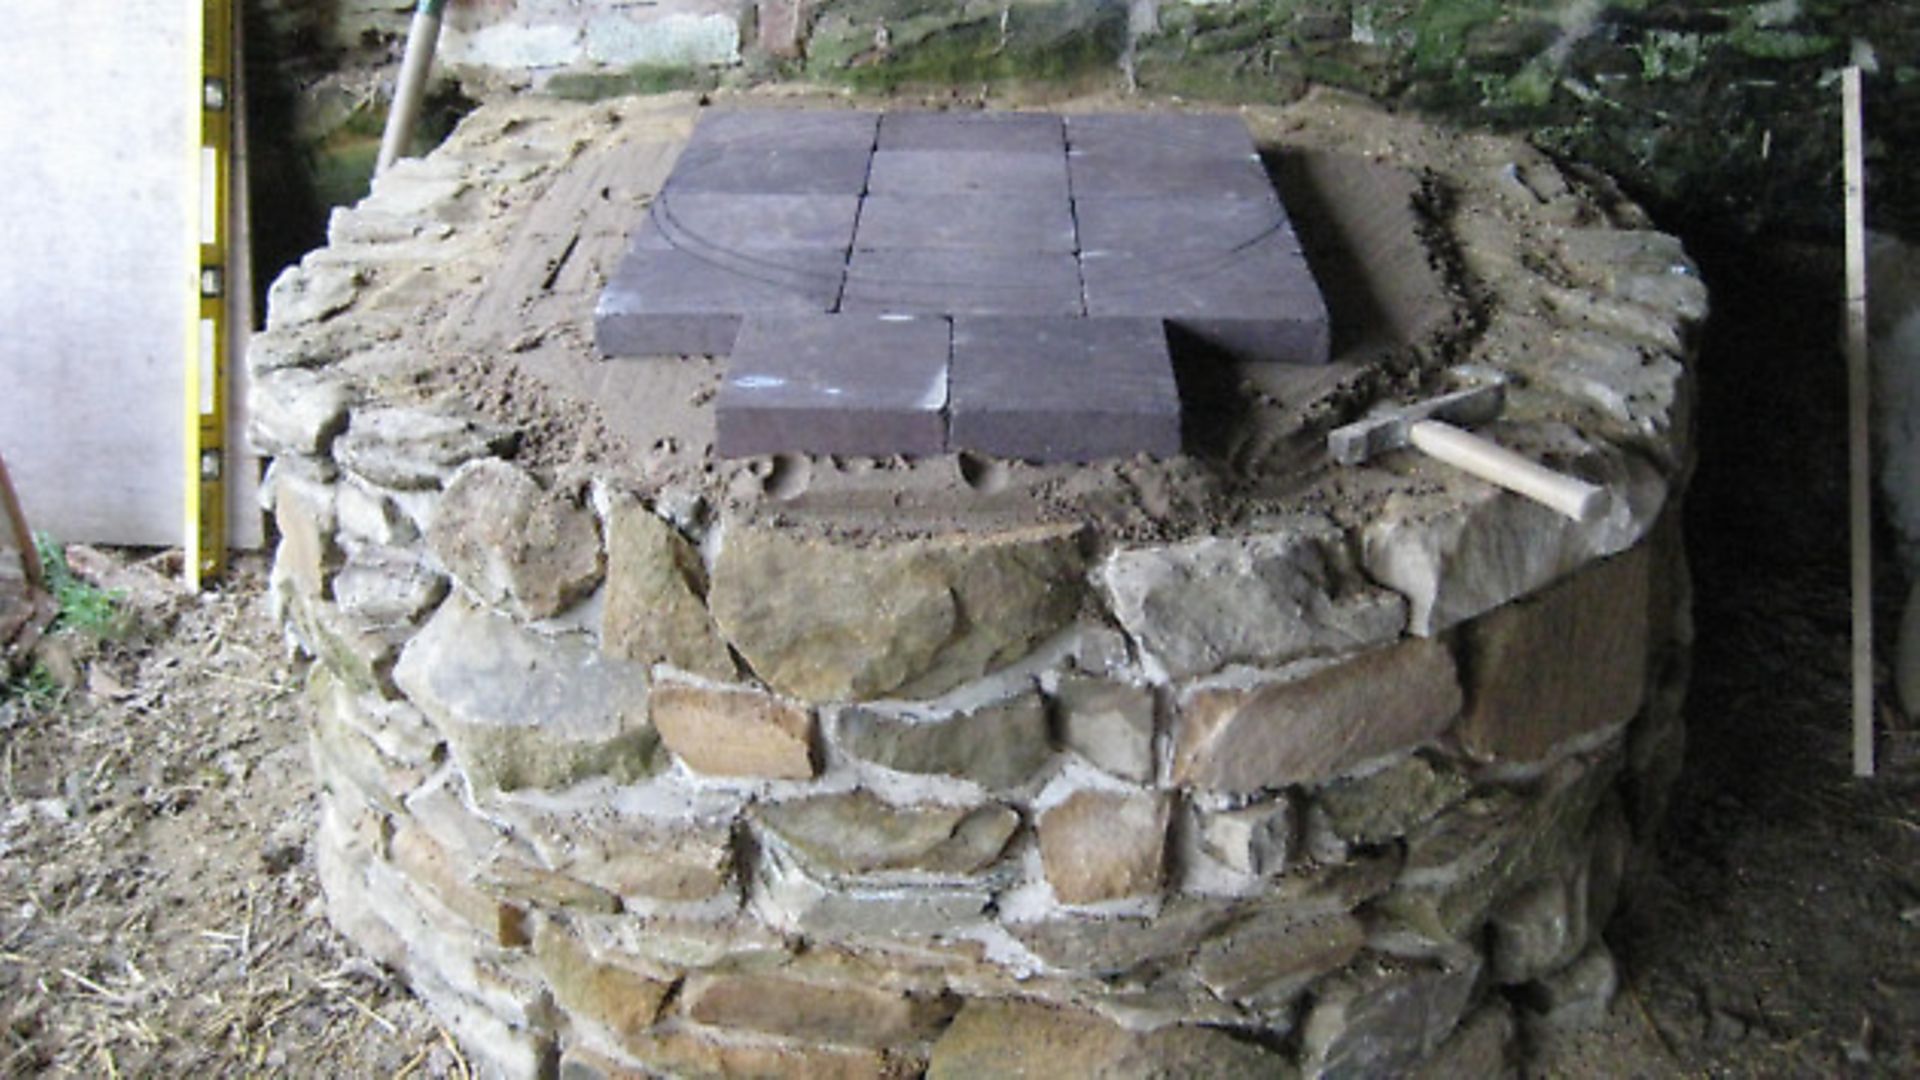
Building your own cob oven
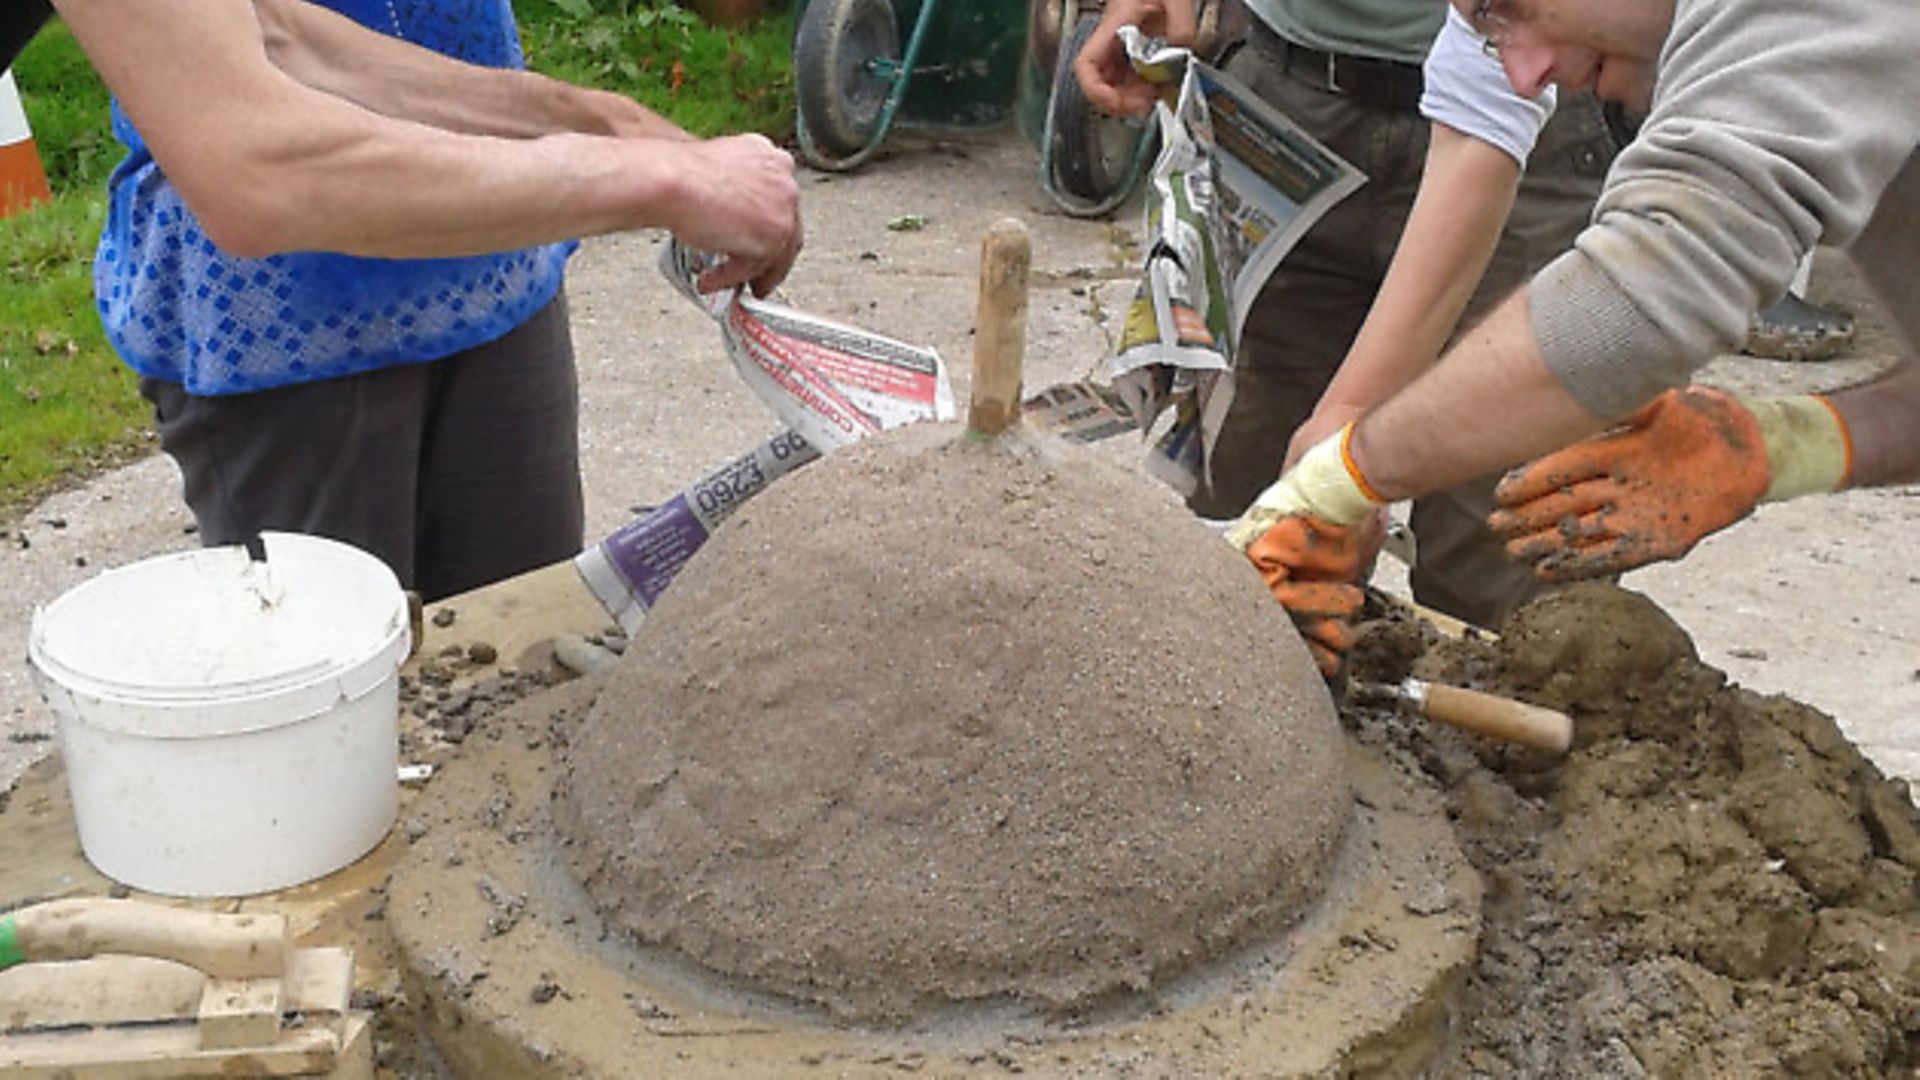
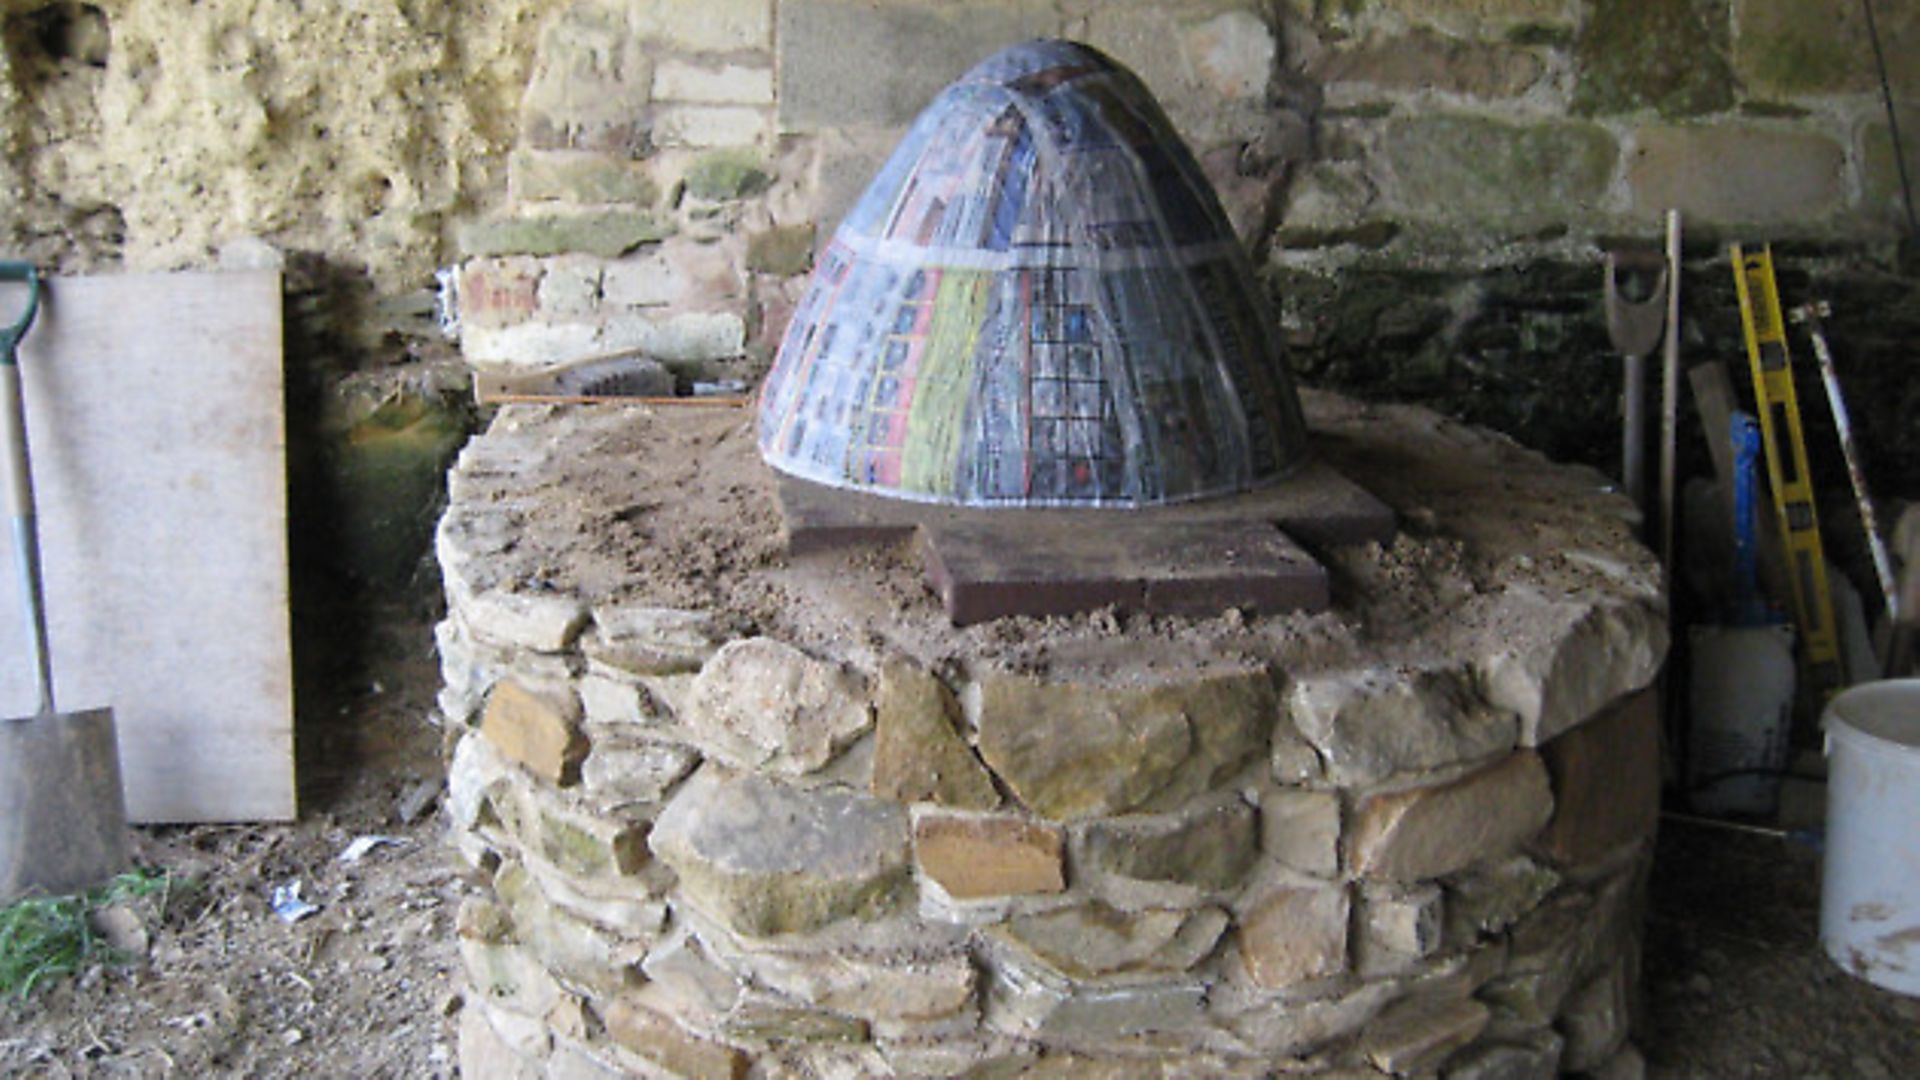
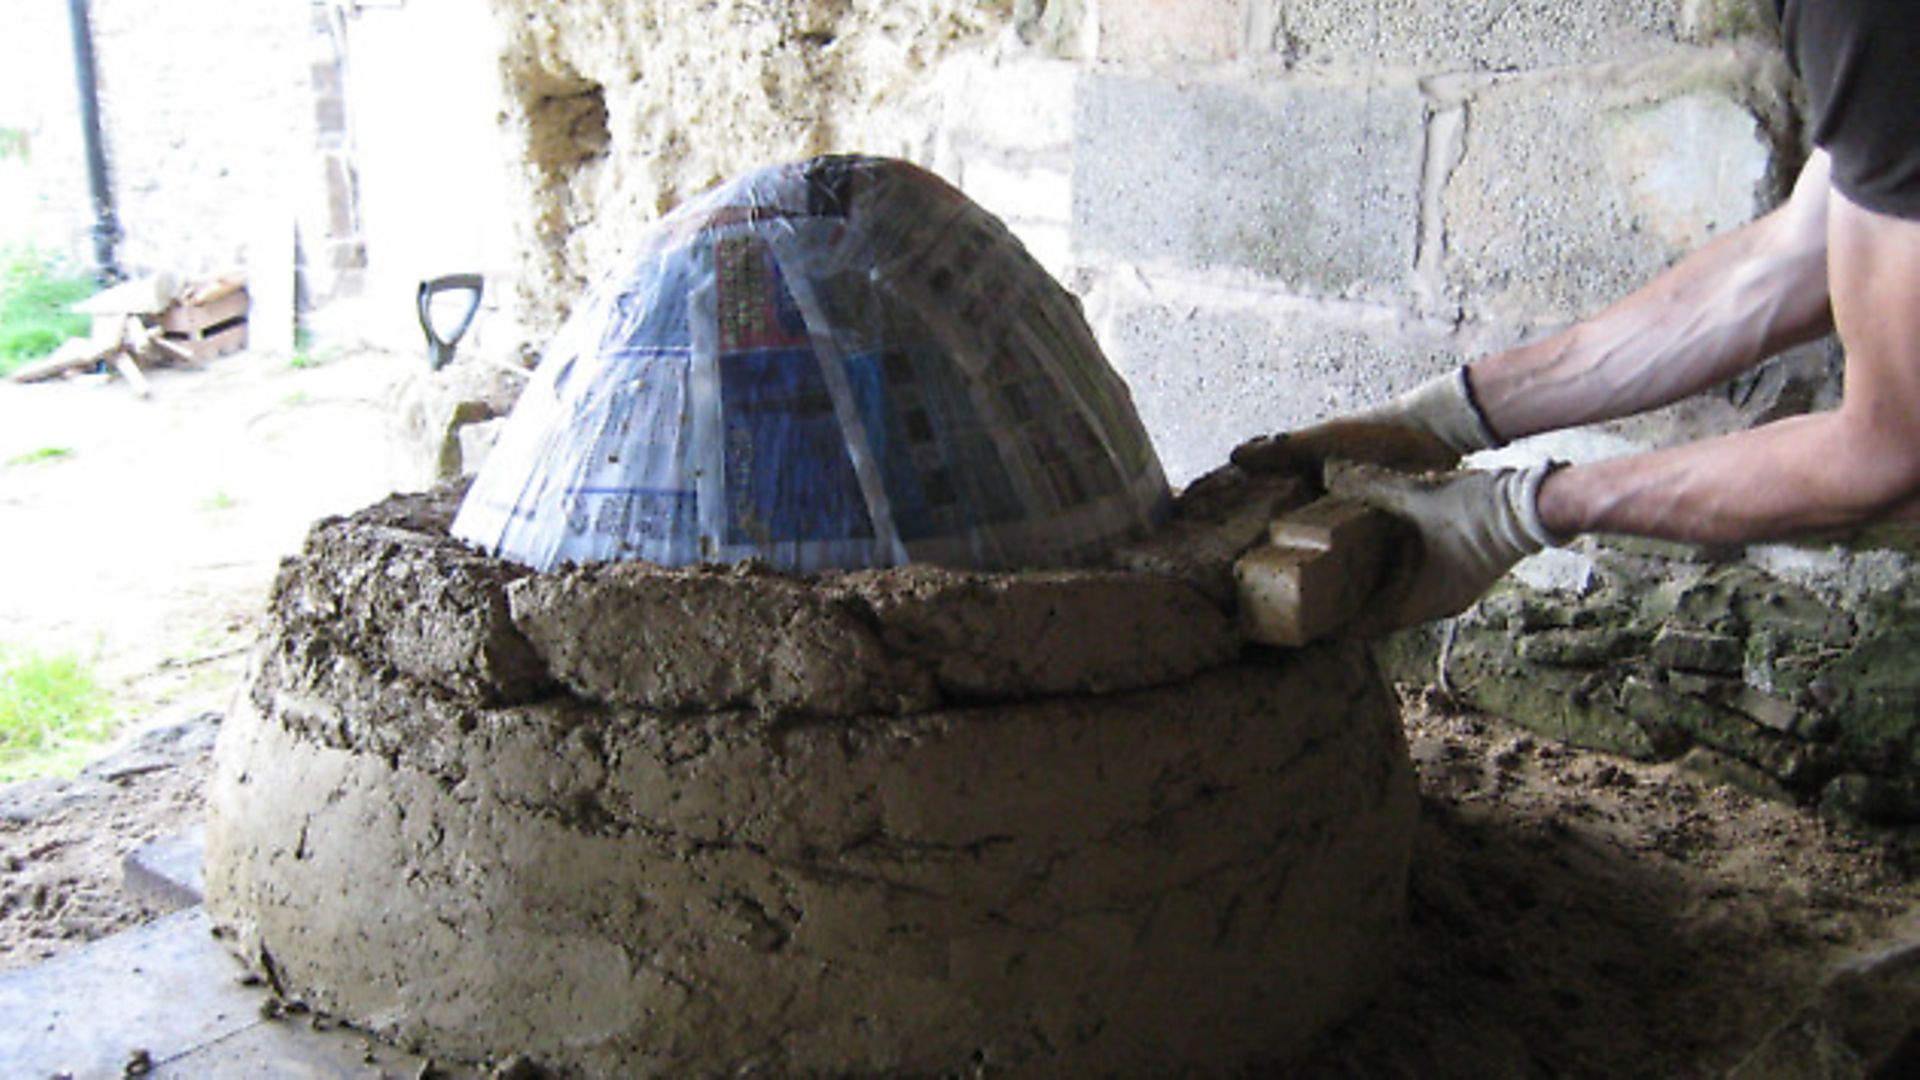
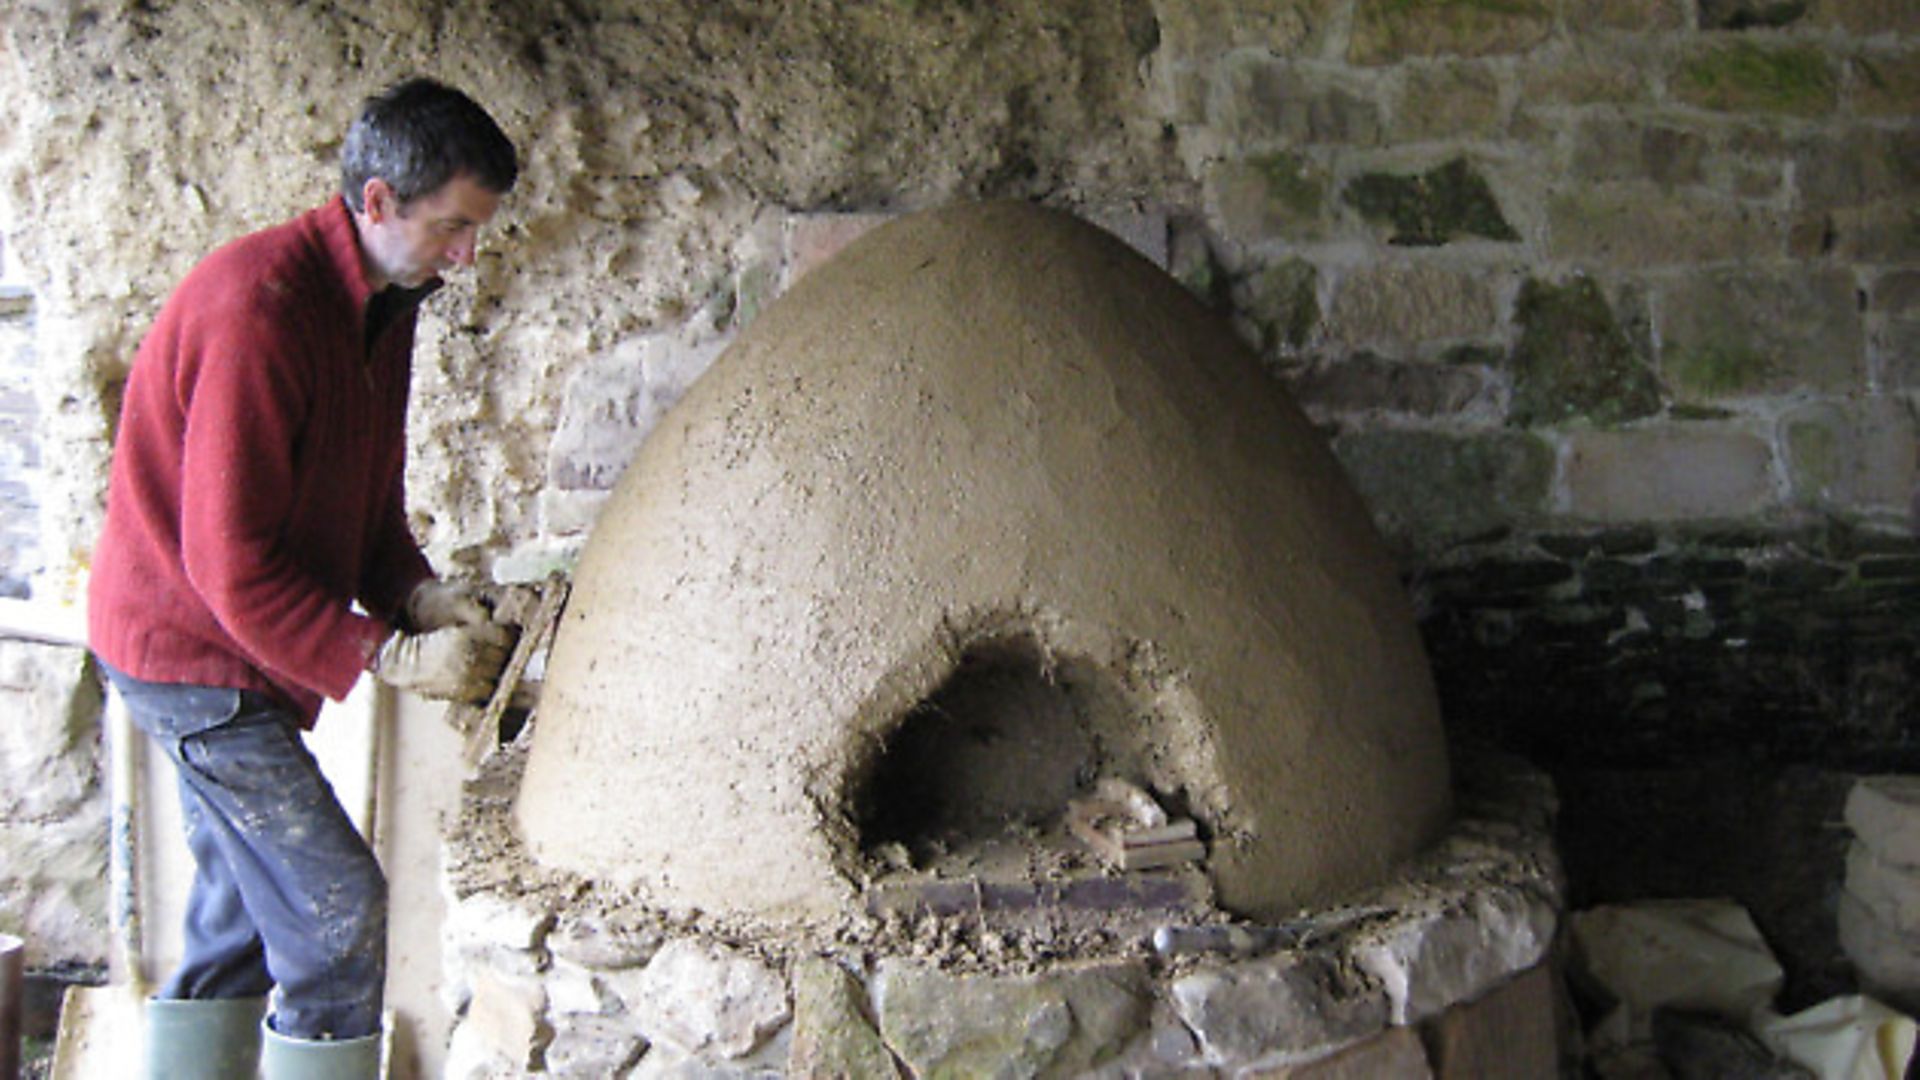
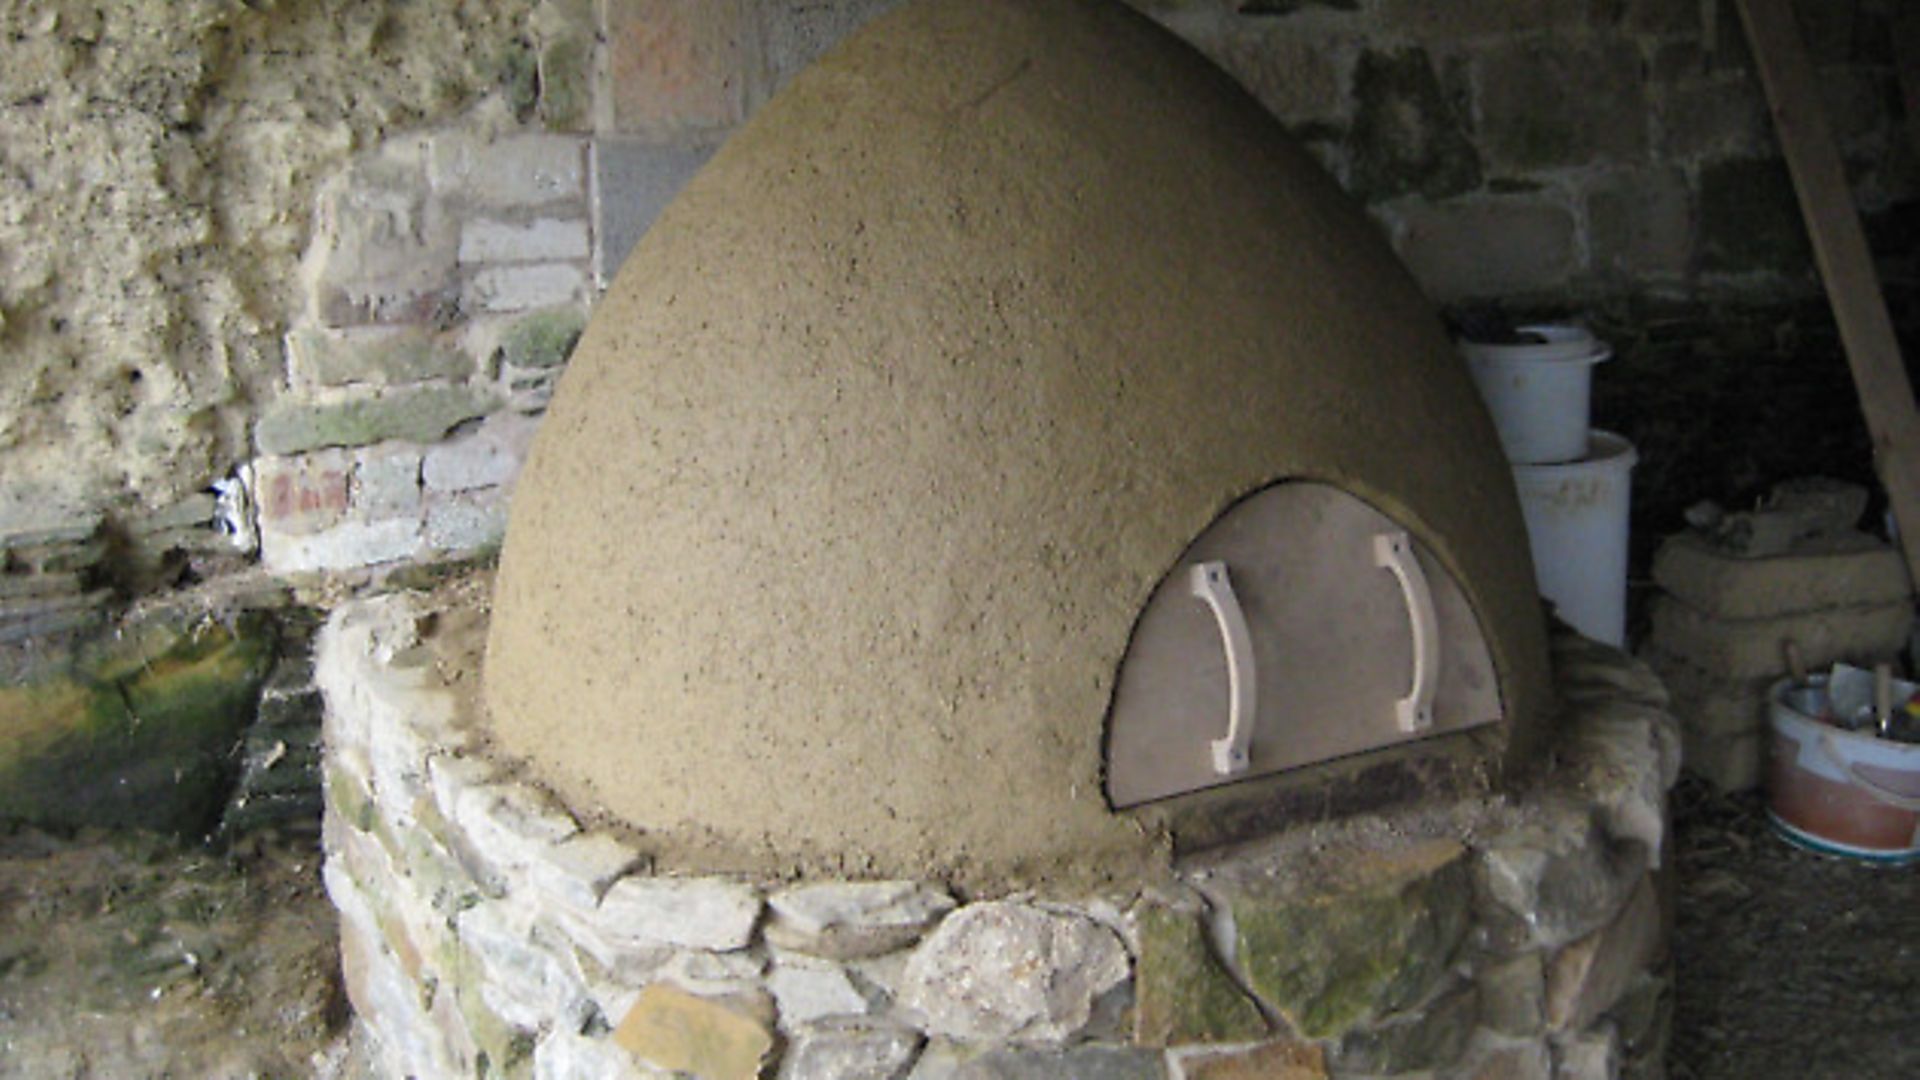
Choosing the right position for your oven is critical; it’ll need a roof to sit under and a solid surface to sit on. We built the base for ours from heaps of old stone from the garden, topped with discarded storage heater firebricks. You build a dome of damp sand on top of the fire bricks and then cover it in newspaper soaked in wallpaper paste to prevent the mound collapsing. Form brick sized clumps of cob and layer it round and over the dome. When you have a complete first layer you repeat the process, this time incorporating straw or rush, an armful of dry matter to a barrow load of cob. When your two layers are done, score the surface so that the earth render gets a decent purchase. Cut out your doorway and then carefully remove the sand and wallpaper through the opening. A nice sticky wet earth render is then applied and left smooth or carved if you have artistic talent. A door is essential to stop the heat escaping during cooking and we made ours and the door handles out of oak – do avoid anything metal as it will get too hot to handle.
Drying out
Waiting to light the oven is probably the most challenging stage of the operation; you’ll need to resist the urge to build a major fire and not expect to start cooking the minute the oven is built. The more slowly the oven is allowed to dry, the better the chance of avoiding cracks. This is true for both internal and external heat, so protect the oven from baking sunshine with a tarpaulin or damp sheet. You can speed the process up a little by lighting a series of very small but gradually increasing fires in the oven, but be prepared to give your oven several weeks to dry out.
Firing the oven
You may have some hedge or coppicing trimmings or other bits of timber around your smallholding with which to light the oven; hazel, blackthorn, hawthorn, oak and even willow work fine. You’ll need around half a wheelbarrow of wood in short stick lengths for a day’s cooking. Start the fire in the doorway using paper or cardboard and thin pieces of kindling, adding more until you have a pile of freely burning material, then gradually push the fire back into the body of the oven. Add sticks every half an hour until the oven has reached cooking heat which can take three to four hours. At this point the outside of the dome will still be barely warm. When you (or an oven thermometer) think the oven is hot enough, rake out the ash and embers into a metal container and put safely out of reach. If you are going to cook directly on the oven floor and are worried about ash on your food, you can wipe the oven floor with a wet rag on a stick.
That’s it. You now have something far more beautiful than a gas barbecue that runs on wood trimmings and scraps. It will keep you cosy on spring and autumn evenings as you gather round to greedily sample the pizza, and if you decide you don’t like it or want to build one in a different spot, the material all returns to the earth from which it came. We are contemplating building a second cob oven in the lambing shed to keep us full of good things on long cold nights.
LEARNING HOW TO BUILD A COB OVEN
Visitors and our smallholder course participants were always asking us about the cob oven, so we now run courses on how to build your own. It’s a fun hands-on day and you will work through all the stages of building an oven and, of course, lunch will be cooked in our cob oven. To check out course details and for more information go to http://www.smallholdertraining.co.uk/coboven.html, or contact Debbie on 01837 810569 or debbie@smallholdertraining.co.uk
*Debbie Kingsley and Andrew Hubbard’s Devon smallholding was recently featured in our series Your Good Lives.
Image(s) provided by:
Archant